I am a member of the Collective Bias® Social Fabric® Community. This shop has been compensated as part of a social shopper amplification for #CollectiveBias and its advertiser. #WalgreensBeauty
It's a miracle that I'm able to do a nail DIY on the blog. If you haven't been following, my gross lifelong habit was biting my nails. Real cute, I know. But then I got engaged and the thought of showing people my ring, attached to stubby, hang-nailed, gnawed down fingernails kind of made me feel a bit sick to my stomach. I suppose all it takes to break a habit is an engagement ring... And a ton of willpower and more nail polish than you can shake a stick at.
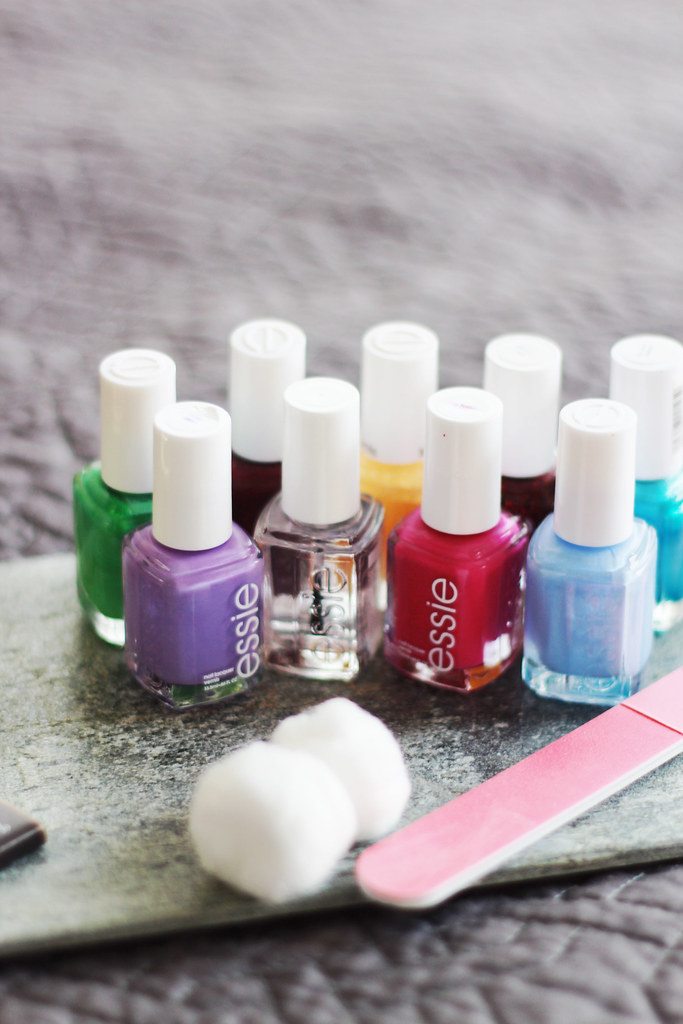
What's my trick? I keep my nails permanently polished. And I'm not made of money, so I paint them myself. I have a big bag of nail polishes but I really stick to brands that I trust not to chip quickly or smudge easily after being painted. I know you are all giant Essie fans because who wouldn't be? The polish is thick (think one coat for good coverage) and it lasts on my nails, as long as I don't go neurotic and pick at them, for at least three days without noticeable chippage. I also love that you can pick up Essie at the drugstore. It's not hard to be distracted by a ton of pretty spring nail colors when walking in to Walgreens to pick up bobby pins and shampoo.
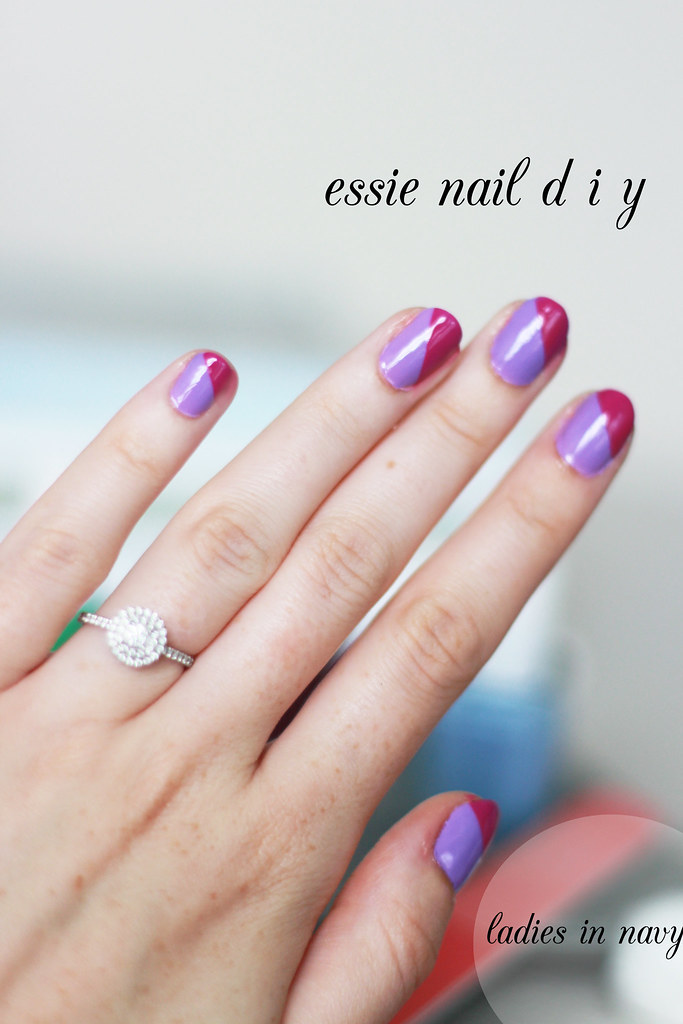
In honor of my grown-out, paintable nails, I thought I'd share a spring nail DIY that's remarkably easy, fun, and totally doable in an afternoon.


(Snag the spring Essie colors fast - you can see how popular they are at Walgreens)
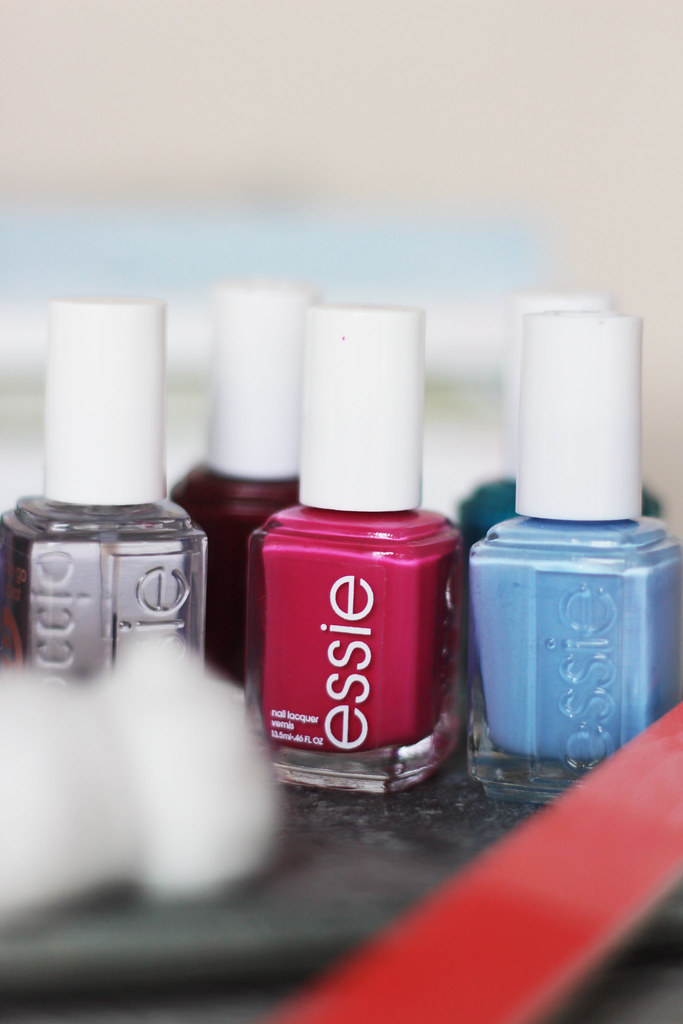
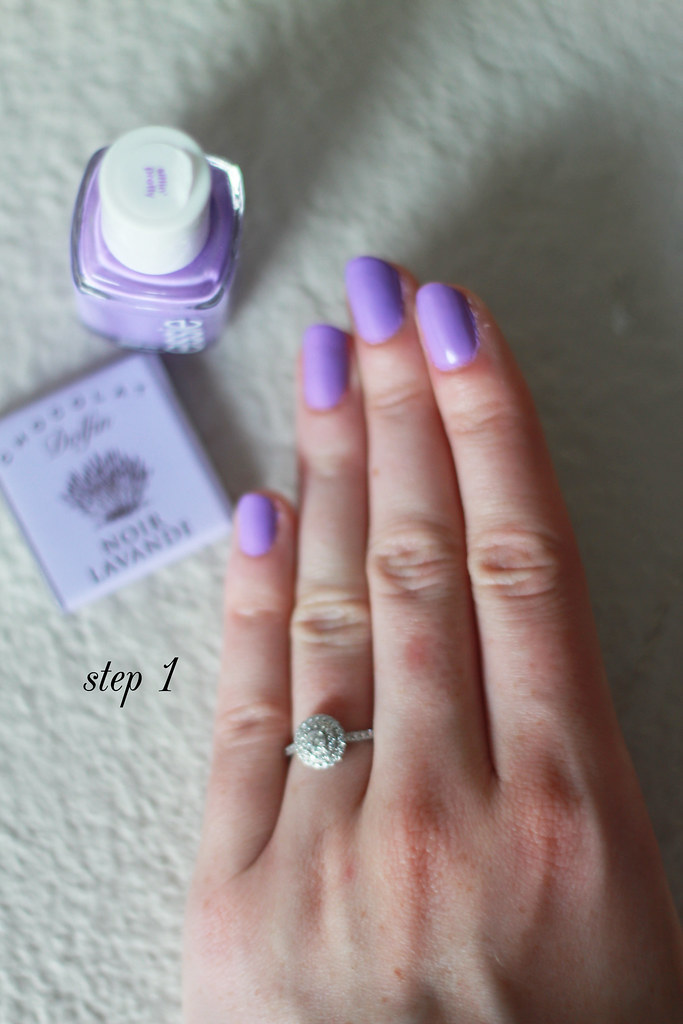
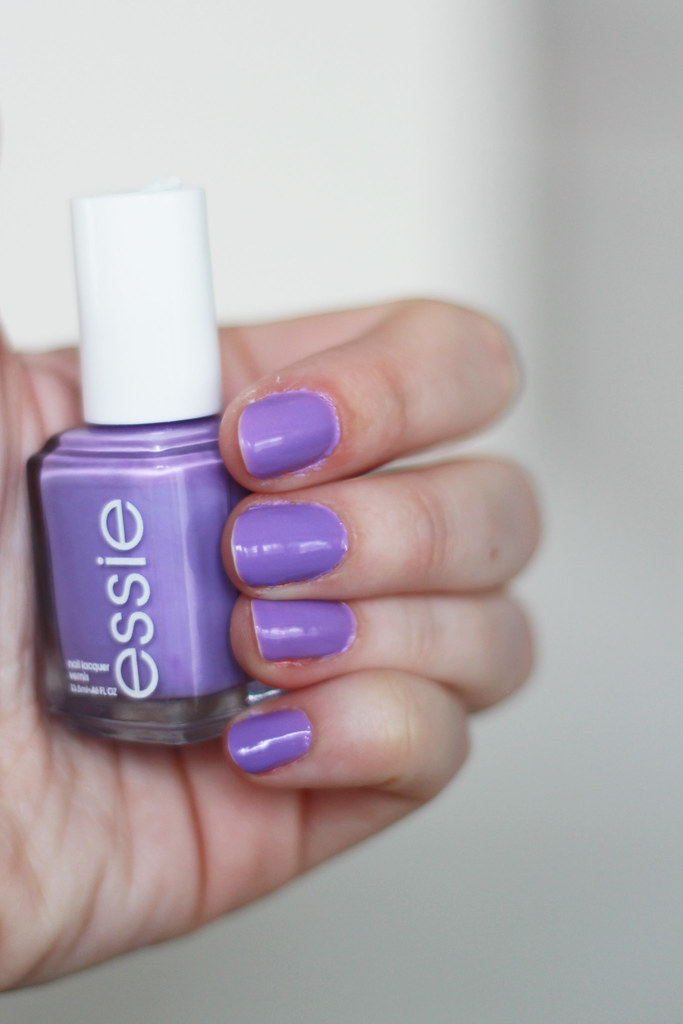
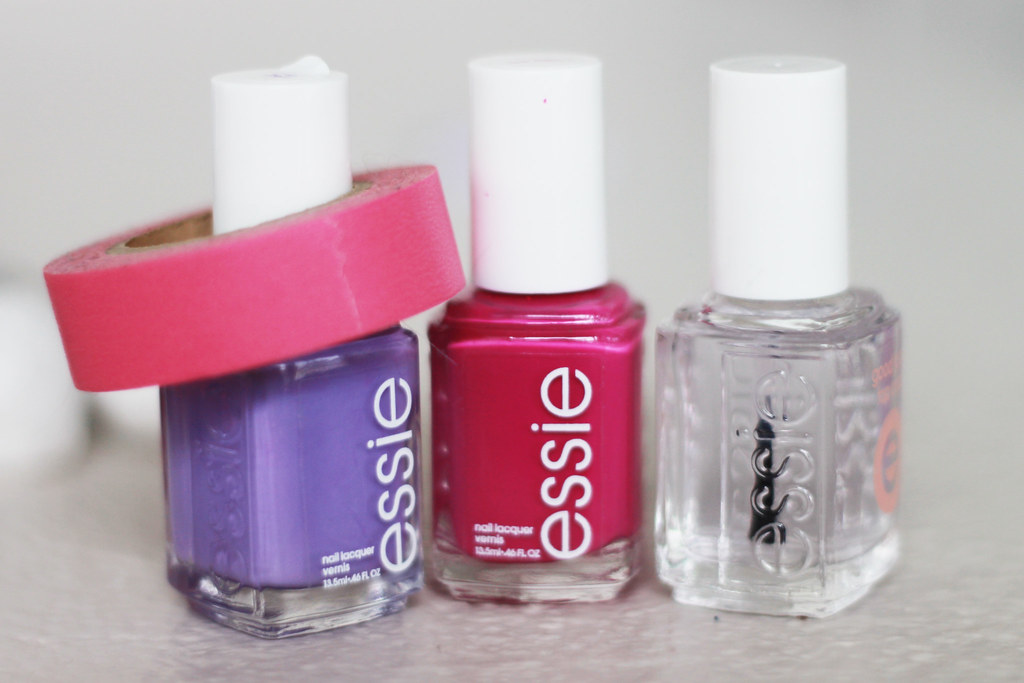
Step 1: You'll need two Essie colors. I used Sittin' Pretty and Too Taboo. Start with a sticky base coat for smooth coverage and then apply one to two coats of polish depending on how the coverage looks! Don't top coat. Let dry for at least an hour to assure it's hard and set before step 2.
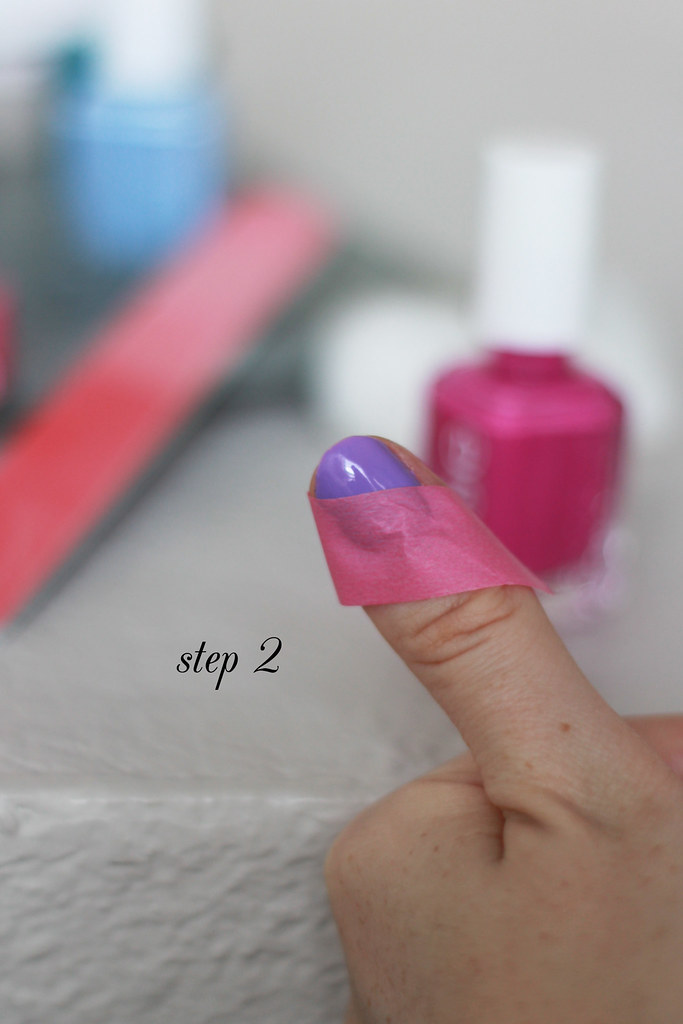
Step 2: Use a tape that's not too sticky to tape off a section of your nail (think painters or athletic tape). Washi tape works remarkably well and isn't too sticky. Make sure to press down on the nail to assure there are no places where polish can leak down onto the lower part of the nail.

Step 3: Paint the exposed section of nail with your second color and let dry for about 10 minutes (minimum) before removing the tape.

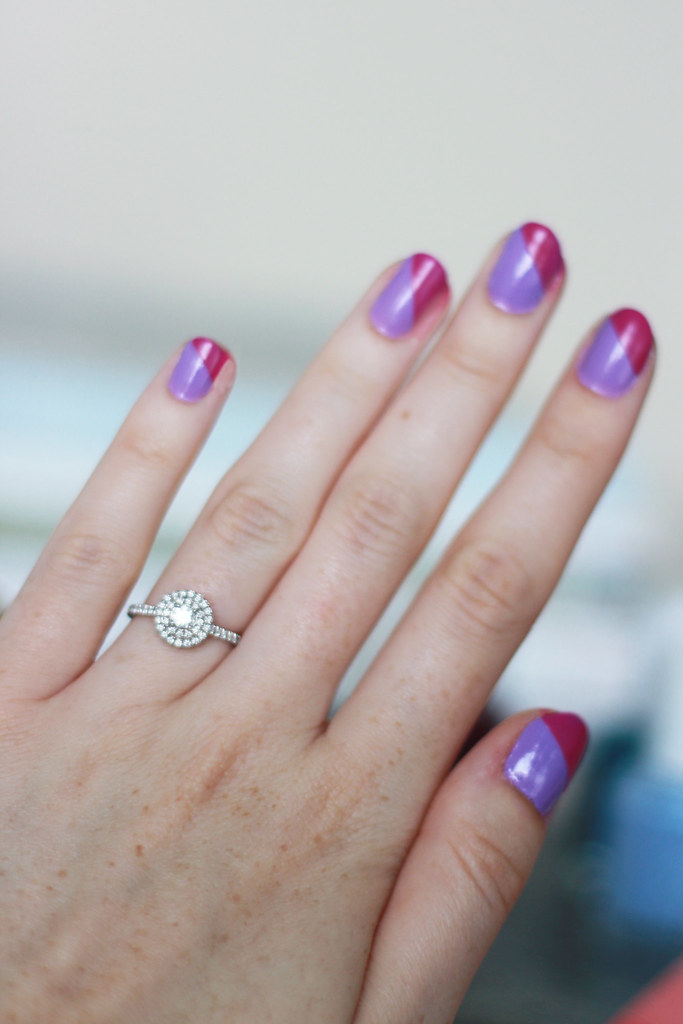
Step 4: After removing the tape carefully, use a top coat (love this Essie one!) to make sure the tip of color doesn't peel off or feel rough.
Let dry and voila! Professional looking lines in four easy steps.
I love Essie. That looks really cute & I love the colors you picked. Happy Memorial day!
ReplyDeleteEssie is a great polish!
ReplyDeletepinkandnavystripes.com
gosh the many uses of washi tape!
ReplyDeletexo cassandre
www.theworkette.com
love this.
ReplyDeleteI will have to try this!
ReplyDeleteHaley
haleyvalerie.com
awesome nail polish!
ReplyDeletewww.bstylevoyage.blogspot.com
xx
I will have to try this! Love your blog! Check mine out at www.hugswishes.blogspot.com
ReplyDeleteI follow back!
ahhh I love how you did this! The colors are great together, and I'm such a fan of Essie too! Love it :)
ReplyDeleteRory
www.WearAboutsBlog.com
Gorgeous! I finally broke my nail biting habit with an engagement ring and pretty nail polish too :)
ReplyDeletexx
Here&Now
Enter to win a personal styling session!
You know how Fat Amy doesn't want to be put down for cardio? Yeah, don't put me down for nails. I am the worst!
ReplyDeleteyour nails look beautiful! i am a terrible nail biter too and my nails are perpetually painted to prevent me from chewing (which still happens...) maybe i just need to get engaged! haha
ReplyDeletexo,
gabby
www.likealittlefox.blogspot.com
smart! I would totally do a look like this for a pedicure or something!
ReplyDeleteXOXO
http://aprettythought.org/
Beautiful colors :)
ReplyDeletexx,
Lily
http://pslilyboutique.com
I wonder if painting my nails with these fun Essie colors would help me kick the nail biting habit? The colors are amazing! #client
ReplyDelete